

What Is The Little Yellow Diamond That Is In My Avery Label Template
Nosotros've designed our labels for problem-free press, but we understand that at that place are times when printing tin can go problematic. If you're having problems printing labels, we want to help.
Below are a few troubleshooting tips to resolve some common label printing issues.
1. Ink Smearing / Toner Flaking
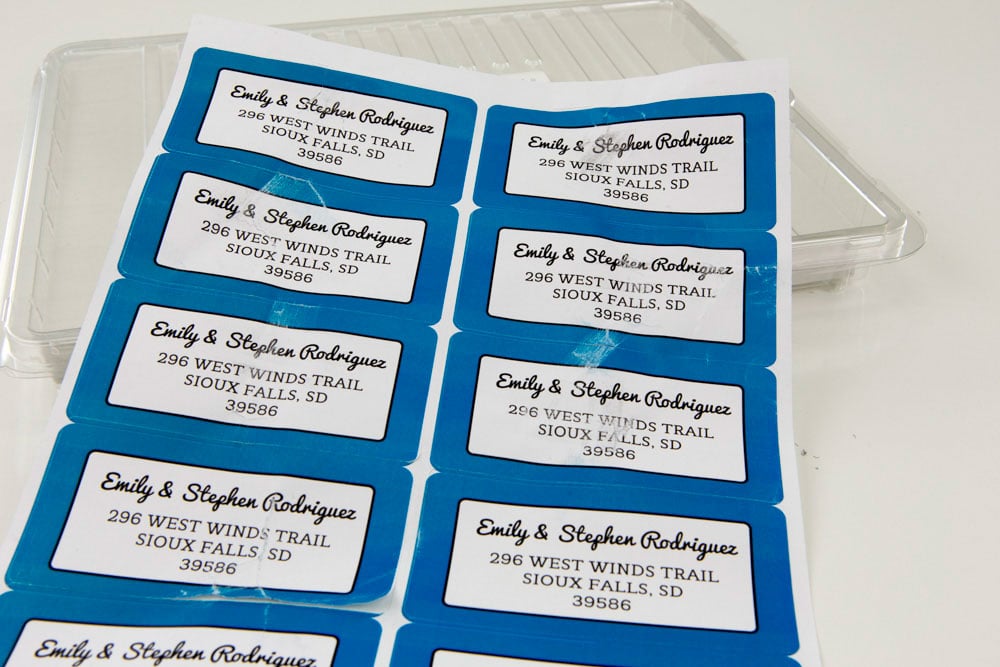
When your ink isn't drying, the solution depends on whether you're using an inkjet or light amplification by stimulated emission of radiation printer.
The paragraphs below expand on quick fixes for each. You tin can also jump to our Recommended Print Settings chart for suggested fabric settings. Please note that textile settings and performance can differ between printer models.
Inkjet Printers
If yous're experiencing ink smearing, the ink may non exist drying completely because the standard print settings are too loftier, causing over-saturation of the label paper.
A mutual solution is to reduce the quality setting. Open up the printer dialog box and select "Backdrop" or "Preferences." Look for the "Print/Quality" tab or the "Quality/Print Quality" option. From there, you can select a lower dpi or make a quality adjustment.
For black ink in particular, selecting the "Print as Paradigm" box in the print dialog pop-upwardly may assist.
Light amplification by stimulated emission of radiation Printers
If your toner is flaking off, the toner may non be bonding to the material correctly considering your material setting is too light.
Most of the time, adjusting the textile setting to something thicker volition fix this trouble. You tin exercise so past opening your printer dialog box and clicking on "Advanced Options." Select the dropdown for "Paper Blazon" (it may be labeled "Type Is" or "Material Type" too). From there, you can select a thicker material option.
Not certain which type of printer you're working with? Our printer type guide will help you effigy it out.
Recommended Settings for Label Press
| Material Name | Material Lawmaking(s) | Printer Textile Setting |
|---|---|---|
| Standard White Matte | Plain | |
| Removable White Matte | Plainly | |
| Aggressive White Matte | Evidently | |
| 100% Recycled White | Plain | |
| White Gloss Inkjet | Photograph / Sleeky | |
| White Gloss Laser | Photo / Glossy | |
| Weatherproof Matte Inkjet | Photograph / Sleeky | |
| Weatherproof Polyester Light amplification by stimulated emission of radiation | Labels | |
| Weatherproof Gloss Inkjet | Photo / Sleeky | |
| Blockout for Laser | Plain | |
| Articulate Matte Inkjet | Photo / Glossy | |
| Clear Matte Light amplification by stimulated emission of radiation | Labels | |
| Articulate Gloss Inkjet | Photo / Glossy | |
| Clear Gloss Laser | Labels | |
| Silver Foil Laser | Labels | |
| Gold Foil Laser | Labels | |
| Silver Foil Inkjet | Photograph / Glossy | |
| Aureate Foil Inkjet | Photograph / Sleeky | |
| Weatherproof Silver Polyester Laser | Labels | |
| Fluorescents | Patently | |
| Pastel Colors | Plain | |
| True Colors | Obviously | |
| Brownish Kraft | Labels | |
| Iron-On Transfers | Plain | |
| Integrated Form Labels | Obviously | |
| Cardstock Paper | Heavy / Cardstock | |
| Magnetic White Gloss | Photograph / Sleeky | |
| Void Silver Polyester Laser | Labels | |
| Chalkboard Labels | Northward/A | |
| Patterned White Matte Cigar | Labels | |
| Patterned Argent Cigar | Labels | |
| Weatherproof Vinyl Laser | Labels |
2. Scaling Problems
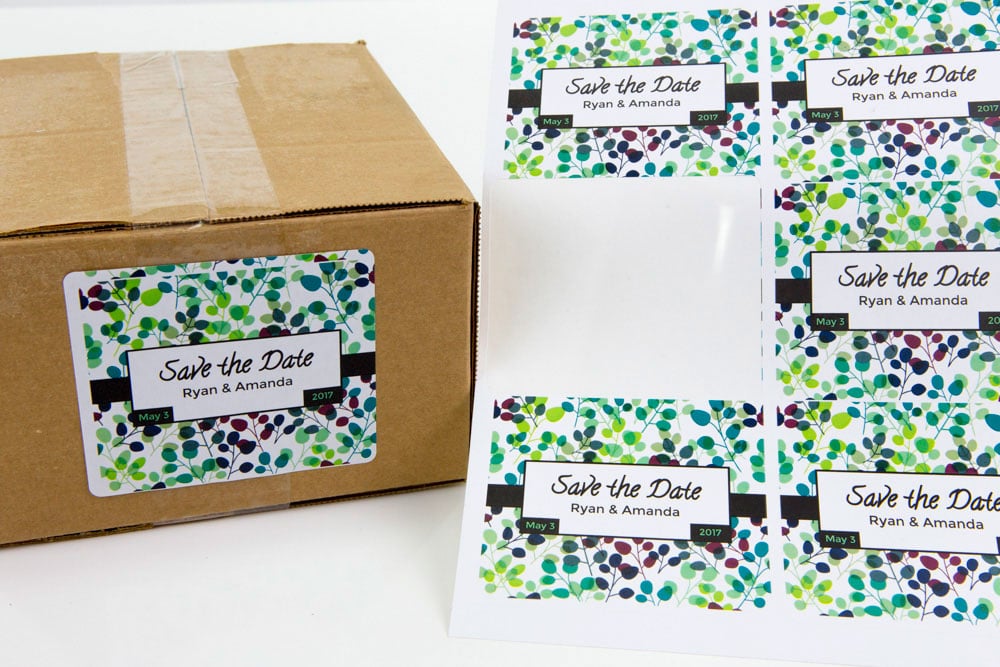
Some programs may stretch or shrink your blueprint in an effort to help it fit within the page and your printable margins. This can misconstrue your design and/or bear upon how it fits within the die-cuts of your label sheet.
When you hitting print in your preferred program, verify that "Page Scaling" is gear up to "None" and uncheck the "Auto Rotate and Center" selection. It may also be labeled "Resize Page to Fit Printer Margins." If you don't see any of those options, you can ever set up the "Custom Scale" choice to 100%.
If you're running Windows ten or Microsoft Edge, those options may not exist bachelor. If that's the case, nosotros recommend switching to Google Chrome or Net Explorer and installing Adobe Reader.
Adobe Reader is the preferred program by our squad for printing PDFs. Notice out how to ready Adobe Reader as your default PDF viewer. Once installed, you lot can select the "Print to Page" or "Print Actual Size" option. This should ensure your design is press as intended.
three. Alignment Problems
If every characterization on your sheet is out of alignment in the same manner, yous're likely experiencing some printer shifting. As papers feed through the printer, they tin migrate or motion. In some cases, these shifts can exist noticeable and outcome in wasted sheets.
If yous're using Maestro Characterization Designer, run the "Alignment Wizard" establish in the "Print" menu. Later answering a few questions, Maestro Label Designer will automatically adjust your artwork to print correctly.
If you lot're using a unlike program, apply a ruler to mensurate the variance on your printed label sheet. In Microsoft Word, you can so add or subtract that number from the margins fix in "Page Setup." For Adobe Photoshop or Illustrator, utilise guides to adapt the location of your artwork on the canvas.
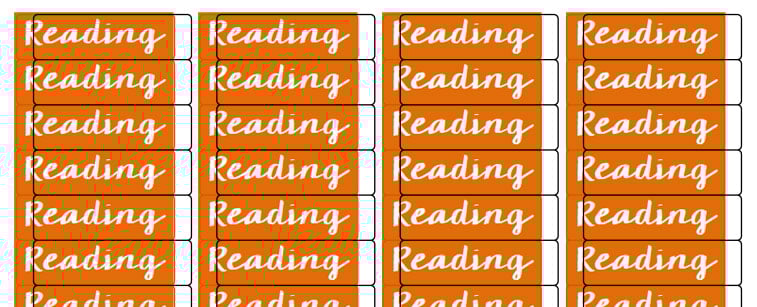
iv. Printed Version Doesn't Match the Screen

If there are lines running through your prototype, squares effectually the design, or it isn't printing in its entirety, open up up the "Avant-garde Options" tab in the impress dialog box.
Look for the "Print equally Epitome" push – you want this box to be checked. Some fonts and/or images can't exist candy by your PDF viewer. By changing your design to an image, you featherbed the processing.
For those with access to Adobe Photoshop, you can help avoid this consequence by flattening your artwork. To save your document as one flattened layer, open up the "Layers" menu and select "Flatten Image." Exist sure to relieve this file as a new document.
5. Paper Jams
Non surprisingly, this is the most common problem people experience with their printers. If your labels keep getting stuck, we suggest changing your material setting. Open your printer dialog box and click on "Advanced Options." Select the dropdown for "Paper Type" (it may be labeled "Type Is" or "Material Type" too). From there, select the standard setting for apparently printer paper.
Once you close the dialog box, print a blank sheet of printer newspaper. If the paper passes through with ease, try printing your labels once again (without irresolute the settings). If yous experience no bug, you're good to commencement printing your labels again.
If that doesn't fix your trouble, you may be experiencing the result of a dusty feed path. That means your impress rollers have gotten dirty from regular utilise and need to be cleaned. You can exam this possibility by looking for streaks on a bare impress. Streaks indicate the path is dirty. Look to your printer's manufacturer for cleaning and maintenance instructions.
Our customer service squad is more than than happy to assistance piece of work through whatever issues you may be having. Phone call us at 1-888-575-2235 or visit our back up page to get started. You may as well want to check out related manufactures on the topic, including Printing Tips and our Printer Alignment Guide.
Or, take the stress-free route and allow u.s.a. do your press for you lot. Upload your design or select the "Permit OnlineLabels.com print for me" option in Maestro Characterization Designer, and we'll take everything printed and shipped to your doorstep in no time.

What Is The Little Yellow Diamond That Is In My Avery Label Template,
Source: https://www.onlinelabels.com/articles/troubleshoot-printer-problems
Posted by: bowlesarned1981.blogspot.com
0 Response to "What Is The Little Yellow Diamond That Is In My Avery Label Template"
Post a Comment